Live Content on Instagram Without the Cringe: Steal This No-Fail Playbook
Pre-Game Like a Pro: A 10-Minute Checklist That Nixes Awkward Starts
Think of this as your 10‑minute warmup that kills awkward silences before they hatch. Keep it brisk: you are staging, not scripting — aim for a clear start, confident energy, and a tiny technical safety net that buys you time to breathe if something hiccups.
Minute 1–2: position the camera at eye level, switch on soft lighting, and tidy the background so nothing steals focus. Mute notifications, plug in your charger, and set phone to do not disturb. A dead battery is the fastest route to cringe.
Minute 3–5: craft a one‑line hook and rehearse your first 30–60 seconds out loud. Jot down three punchy talking points on a sticky note and mark where your call-to-action will land so you do not fumble it midflow.
Minute 6–9: run a 15‑second audio test, glance at your connection icon, enable comment moderation or pin a welcome message, and plan a visual cue to snap you out of a blank stare if the chat goes quiet.
Last 60 seconds: take a deep breath, smile, and say the opening line once more. If you want a subtle reach boost without selling your soul, consider pairing this routine with a safe instagram boosting service to get eyes on your debut — then go live.
Open Strong: Icebreakers That Hook Viewers in the First 15 Seconds
Open with a promise that is impossible to ignore: tell viewers in one short sentence what they will learn, feel, or get if they stay. Give a tight time anchor so people know the payoff is immediate. This transforms casual scrollers into curious watchers and makes those first 15 seconds count instead of cringe.
Make that promise visual. Start with a quick camera move, hold a bright prop up close, or flash a bold on screen phrase to break the scroll pattern. Anchor your voice with energy, speak in the present tense, and let facial expressions do half the work. Small theatrical moves compound into big retention.
Use a three option micro strategy to pick your opener:
- 🆓 Promise: Tell them the single benefit in 7 words or less and add a 30 second timer vibe.
- 🚀 Shock: Lead with a surprising stat or fact that contradicts expectation and forces a double take.
- 💥 Question: Ask a fast, specific question that demands an answer in the comments within 10 seconds.
Keep ready-to-run scripts in your pocket. Examples: I will show you one trick to boost story views in 60 seconds. Stay to the end and I will pick one person for a free critique. Watch this prop and tell me what you notice: the answer will be revealed in 30 seconds. Swap words to match your voice and practice three times.
Finish the opener with a tiny invitation: say what to do next in one verb and one word, for example comment, vote, or stick. Rehearse the motion, the smile, and the first line until it lands. When the first 15 seconds feel crisp, the rest of the live becomes permission to speak.
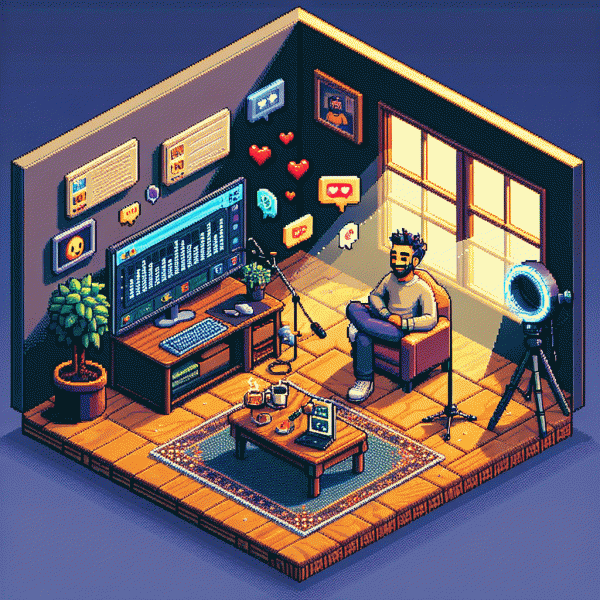
Set the Stage: Lighting, Audio, and Angles That Make You Look Pro
Think of your live as a tiny TV show: if the lighting, sound and camera look amateur, the audience will forgive a lot less. Start by planning one clear visual vibe — bright and airy, moody and cinematic, or clean and branded — then pick gear and placement to support that mood. A consistent look makes you feel confident, and confidence kills cringe.
Lighting: Use a soft key light in front (a window or ring light) and a weaker fill on the opposite side to avoid flatness. Add a subtle backlight or hair rim to separate you from the background. Diffuse harsh sources with a cheap white sheet or parchment paper and keep the main light about 45 degrees from your face for flattering shadows.
Audio: Bad sound ruins good content faster than weird camera angles. Clip-on lav mics are tiny but transformative; a USB condenser or shotgun mic on a boom works too. Test for background hums and room echo — if your voice sounds distant, add soft surfaces (blankets, cushions) behind the mic. Always monitor levels with headphones before going live.
Angles & framing: Eye level or slightly above is your friend. Frame with the rule of thirds so your eyes sit in the top third of the frame and leave natural headroom. For Instagram, keep vertical orientation in mind and avoid extreme close-ups. Use a tripod or stack books; a steady camera looks way more professional than a shaky phone.
Background & depth: Declutter a few feet behind you, add a plant or shelf to create depth, and avoid busy patterns that distract. Small lights or practicals (lamp, neon, branded sign) give character. If you move, practice blocking so you stay well-lit and in-frame.
Quick pre-live checklist: test audio, check battery and storage, confirm frame, fix hair/highlights, mute notifications, and take a 10-second test recording. Do this every time and you'll trade nervous pauses for polished moments — live without the cringe, with a setup that actually supports your energy.
Max Out Engagement: Comment Prompts, Polls, and Giveaways That Don't Feel Thirsty
Think of your live like a party — the host asks the first questions, not screams for attention. Start with a one-sentence icebreaker that asks a tiny choice (emoji, one-word answer) and promise a quick reward: an on-screen shoutout or a reveal. It's low-friction and human, not thirsty.
For comment prompts, use short templates that feel playful: “A or B — pick an emoji” works better than 'Tell me your opinion.' Try 'Finish this sentence: I'd never live without ___' or 'Vote with an emoji: 🔥 for X, 😅 for Y.' Pin the best prompt so latecomers follow the vibe immediately.
Polls during live are micro-engagement engines. If you can't use native poll stickers, run two-option polls by asking viewers to type one-letter answers or drop emojis. Show visuals on-screen — hold up two products or point to graphics — and narrate the results instantly to create momentum.
Make giveaways feel generous, not needy: set one clear, meaningful prize, require one simple action (answer a prompt, tag a friend who'd actually care), and announce winners on-camera. That final reveal turns passive viewers into active ones and keeps the energy authentic.
Before you go live, prepare a 3-step playbook: 1) an icebreaker prompt, 2) two micro-polls spaced 7–10 minutes apart, 3) a short giveaway at the end. Track comments per minute and iterate. Small, well-timed asks beat desperate pleas every time.
Squeeze the Replay: Turn One Live Into Reels, Posts, and Email Gold in 24 Hours
Stop letting your live replay collect dust. In a single afternoon you can convert a 60–90 minute session into a magnetic 15 second Reel, three scroll-stopping feed pieces, and an email that actually gets opens and clicks — all without sounding like a pushy infomercial.
Start by grabbing the highest quality replay file or saving the broadcast from Instagram. Watch at 1.5x and mark timestamps for every meaningful beat: the hook, the aha, and the testimonial moment. Export three focused clips (15–30 seconds each), name them with timecodes, and add a 1–2 line caption idea to each so editors know the intent.
Pick a repurpose path that fits your tempo and budget, then commit:
- 🆓 Free: DIY repurpose on your phone — crop vertical, auto captions, quick trim; good for creators with time but tiny budgets.
- 🚀 Fast: Hire a micro editor for rapid turnaround — send clips, mark the hook, get polished Reels in 6–12 hours.
- ⚙️ Automated: Use a service or tool to batch-trim, caption, and format multiple videos and still hit 24 hours end-to-end.
When you build the Reel pick the strongest hook, add bold captions and a visual beat in the first 2 seconds to stop the scroll. Layer subtitles so the piece works on mute, pick a trending but relevant sound, and finish with a micro-CTA: comment, save, or visit link in bio. For feed posts expand each clip into a carousel with problem, insight, action and a short caption that teases the full replay.
Need a shortcut to amplify reach? If you want to scale faster and add initial social proof try boost instagram followers fast as part of the launch mix. Pair that with three subject lines, a preheader that references the clip, a GIF from the replay, and single-click CTAs that point to your best performing clip with UTM tracking.
Timeline to ship in 24 hours: 0–2h capture and timestamps, 2–6h edit clips, 6–12h polish Reels and carousels, 12–18h schedule posts and Stories, 18–24h send the email and monitor early metrics. Track retention and saves, iterate next week, and let the replay pay dividends long after the live ends.